Lengthy Instructions to seup ESP32-CAM-VideoCam for motioneye
This project is a compiled version of this sorce code https://github.com/jameszah/ESP32-CAM-Video-Recorder-junior
It can be run with or without wifi, with just a +5 and GND powering the ESP32.
If you want to get fancy, you can also add 2 switches to stop/start the recording, and to turn wifi on/off.
So, here are the lenthy instuctions to use the camera to stream to motioneye, as well as recording on the sd.
motioneye runs on raspberry pi’s or similar, and is used to collect video streams and record them, look for motion and take action, and restream the video streams.
https://github.com/motioneye-project/motioneye
Good introduction to motioneye with some dramatic bird rescue over here: https://www.youtube.com/watch?v=ybQzlvukSBo https://www.youtube.com/c/leepspvideo
Setup the ESP32-CAM for your desired SD recording rate, and streaming rate
See the lengthy instructions page https://github.com/jameszah/ESP32-CAM-VideoCam/blob/main/instruct.md
You can record to the sd at maximun rate if you want to get the good video, but streaming to motioneye will use up available esp32 wifi space and can overwelm a pi with searching for motion in large frames, adding titles, and converting the jpeg stream to mp4 video, so streaming too fast will overwhelm motioneye.
I’ve been experimenting with 8 fps HD recording to the SD (or max 12.5 fps), and streaming at 1 fps HD, which will leave the esp32 cool, and the pi zero 2 w with capacity for several similar streams with re-streaming, motion-detecting, and recording.
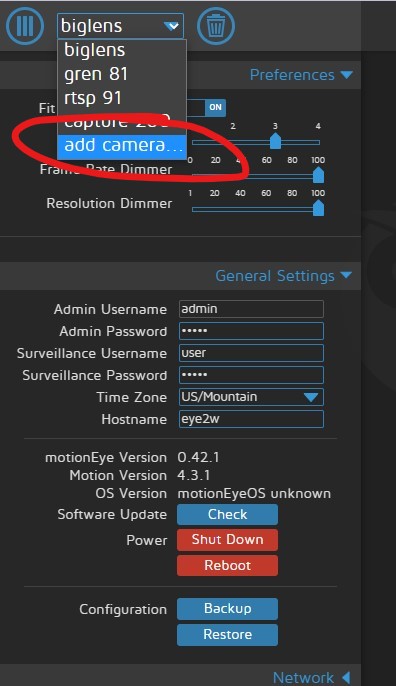
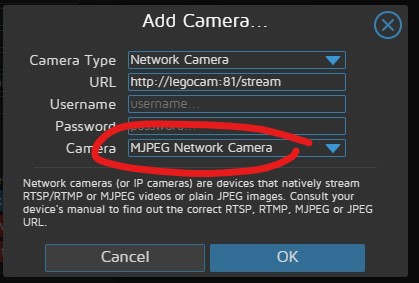
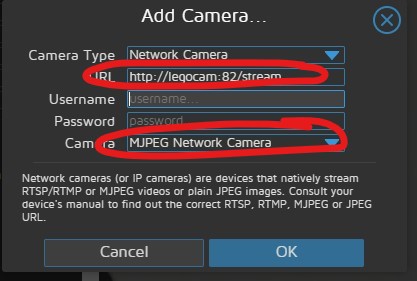
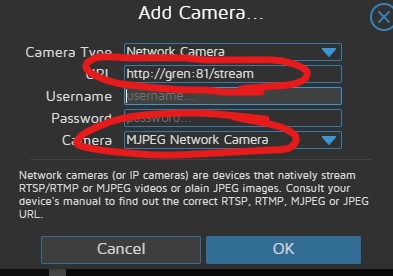
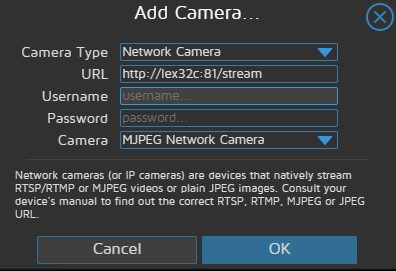
Add a camera
Enter http of the stream
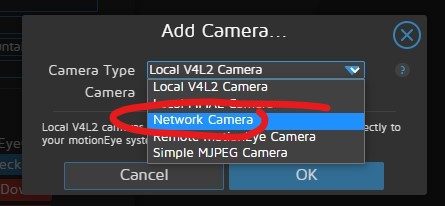
Select the Network Camera option for most cases.
… and enter the url of the stream.
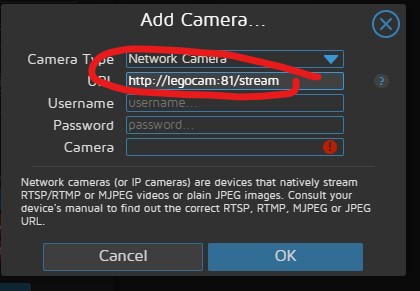
The esp32-cam has no security - use it within your router security, or in ap mode with password security. (see lengthy instructions) The esp32-cam has two mjpeg streams on port 81 and 82, and port 80 is free to look at text status or single jpgs from the cam.
http://legocam:81/stream is the 81 stream. “legocam” is the name of the camera for filenames and the dns name. Use “http://legocam.local” in chrome browser to access the control site.
After you enter the correct url, it will fill in the camera type correctly as mjpeg cam.
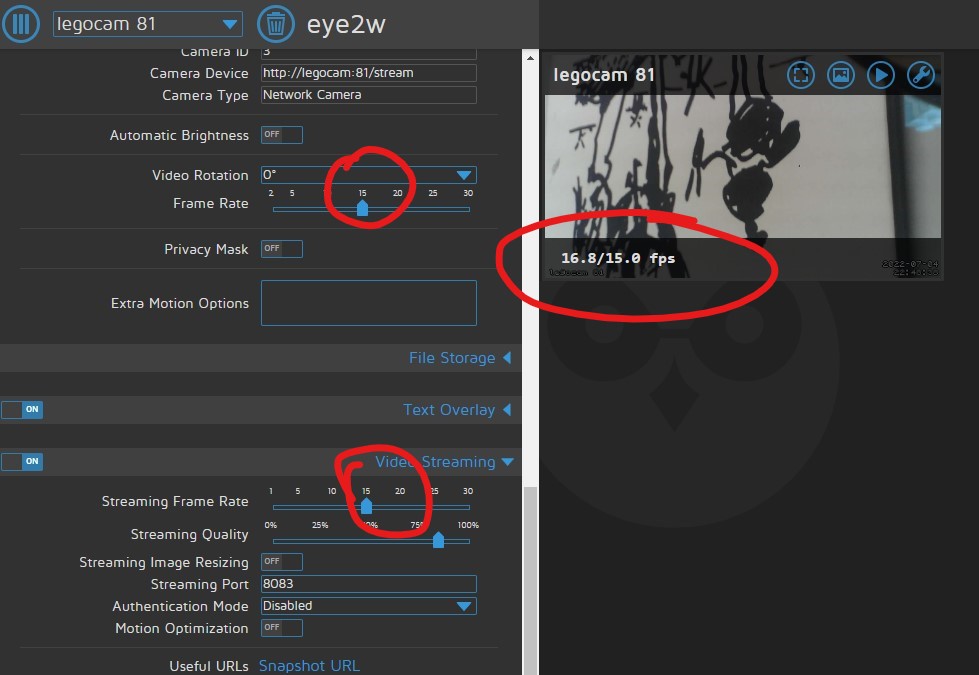
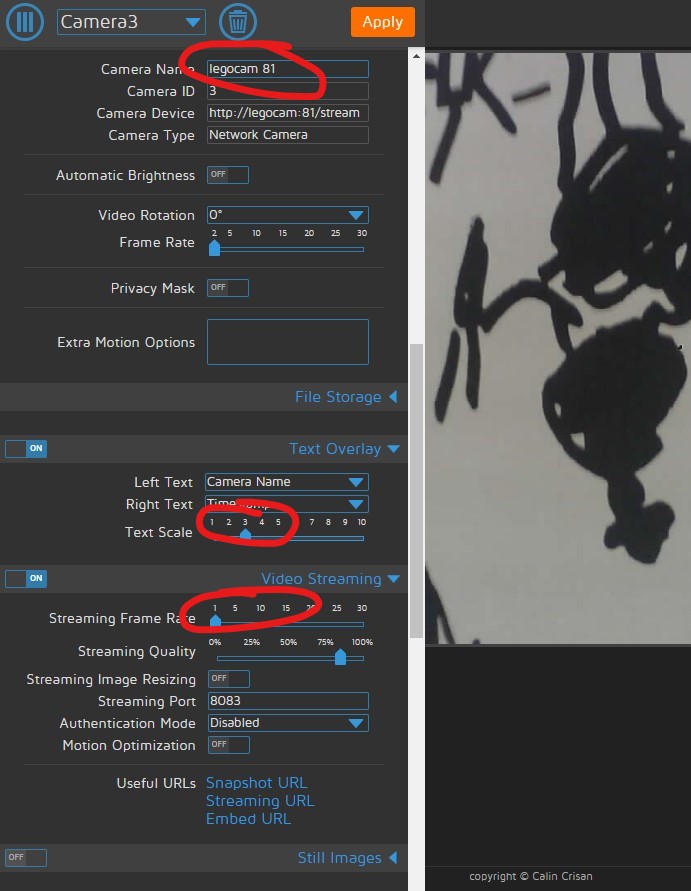
Next configure the camera, by giving it a proper name, increasing the size of text overley to 3, and changing the re-streaming frame rate to 1 fps (as that is all we are providing), and hit Apply.
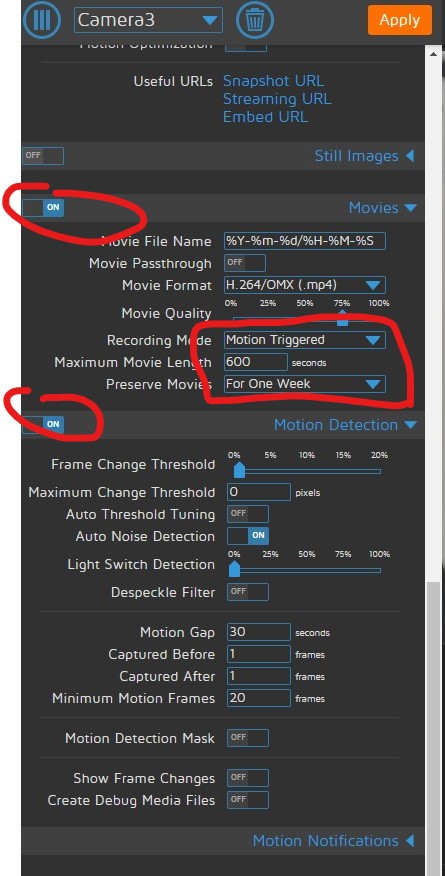
Next, you can enable the motion-detected pictures, and videos. I set max video length for 10 minutes (too small and you get 100s of videos, too big and they take too long to download). And make sure to set auto delete.
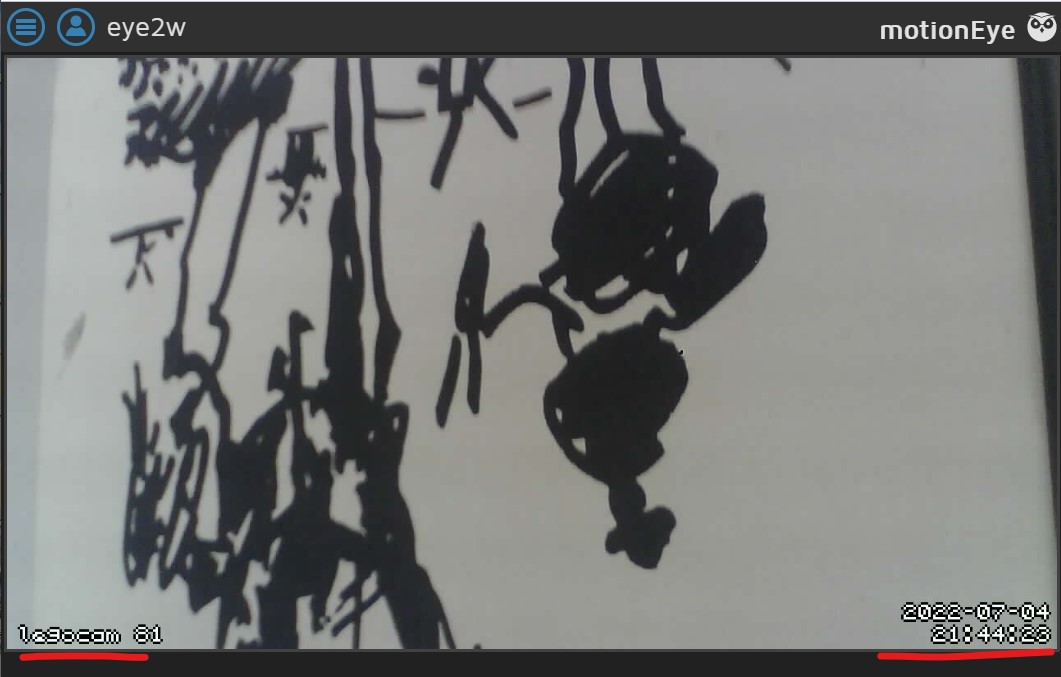
You will see the stream. Click or click-and-hold to see some options in the upper-right, so re-config, see recorded pictures, and videos.
Next, add another camera. In this case will will add the other video stream from the same camera.
http://legocam:82/stream
Next, add another camera. This time instead of a video stream, we will add a stream of single jpg pictures, that motioneye will assemble into a stream, and record, and check for motion, etc. A notmal stream open the channel and sends a series of pictures on its own schedule. This jpg stream just opens the channel, sends one jpg, and closes the channel. It is up to motioneye to chooses the streaming rate. Motioneye has a minimun of 1 second, and up to the speed to your wifi and camera. It would be nice to reduce the 1 second to maybe 10 seconds for slower scenes. This also means that since the channel is closed, more than one motioneye can drive the same camera with these single jpg fetches.
The url for the jpg capture is
http://legocam/catpure
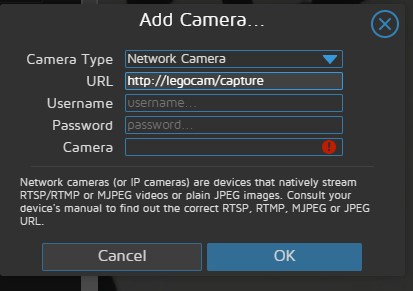
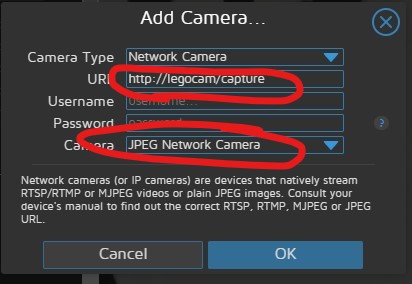
… and it configures the camera as a JPG camera rather than a MJPG camera.
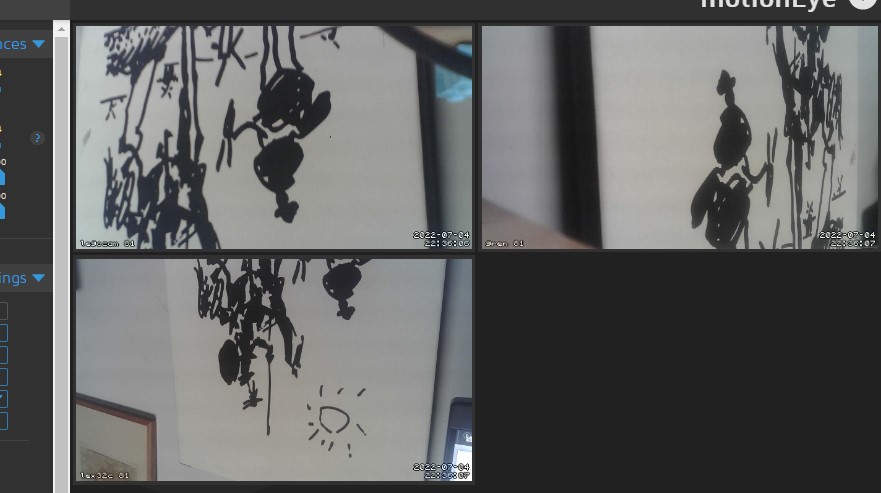
Here is a picture of 4 streams coming from the same esp32-cam-videocam, to a pi-zero-2-w with motioneye – some chips were heating up during this test.
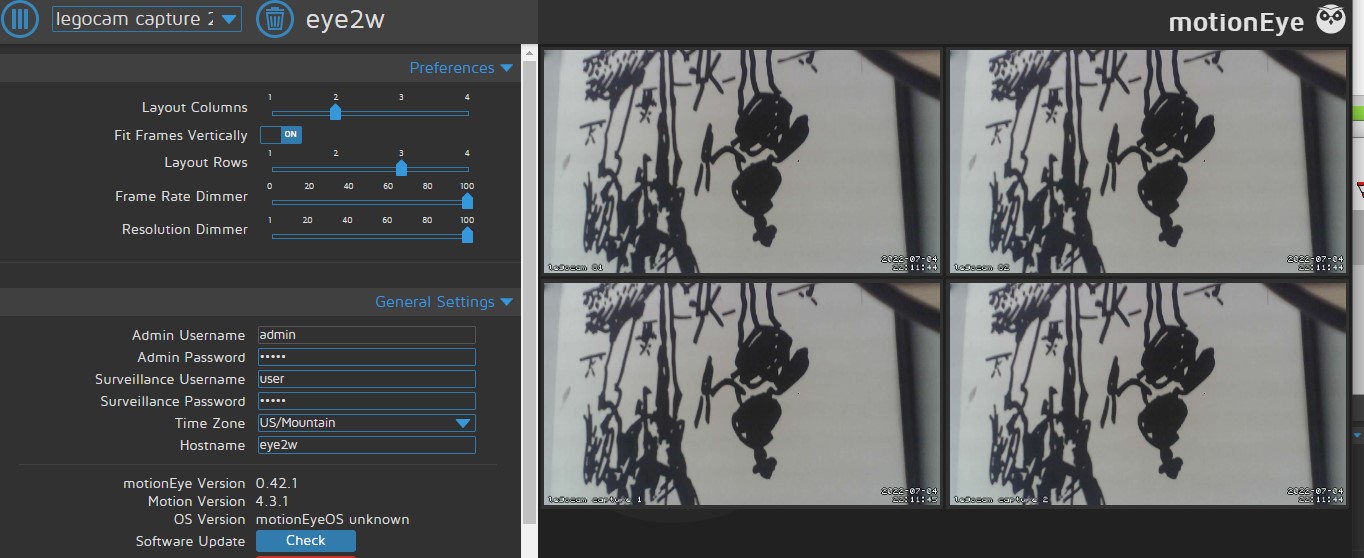
Now, we will turn-off camera for stream 82, and capture 1 and capture 2 (same url), and add 2 more esp32-cam’s with a stream on port 81 (again at 1 fps HD)
And this works quite without any stuttering.
Now turn off those other 2 cameras, and lets increase the frame rate.
Press and hold to bring up the receive and re-stream frame rate in the lower left (and the full screen, saved photos, recorded videos, and configuratio in the upper right)

Now go to the esp32-cam-videocam lengthy instructions to set the recording interval to 0, and the streaming interval to 0. This means it will hit the ov2640 camera max recording rate of 12.5 fps, and it can stream at that rate as will with decent wifi.
After the esp32-cam is set, motioneye will not see the faster stream until you reconfig.
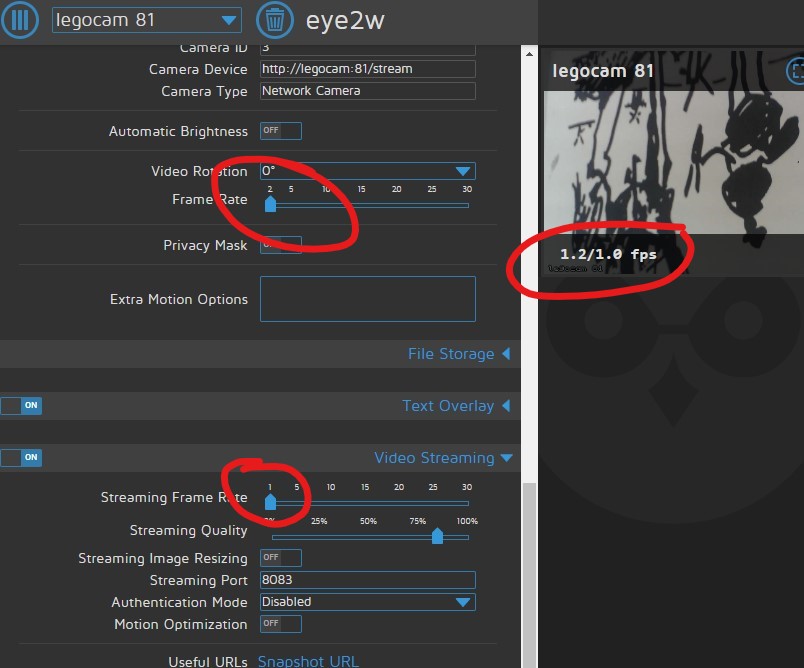
Next, go back to motioneye camera, and slide up the camera streaming rate to 15, and the restreaming rate to 15. This seems to take affect before the Apply.
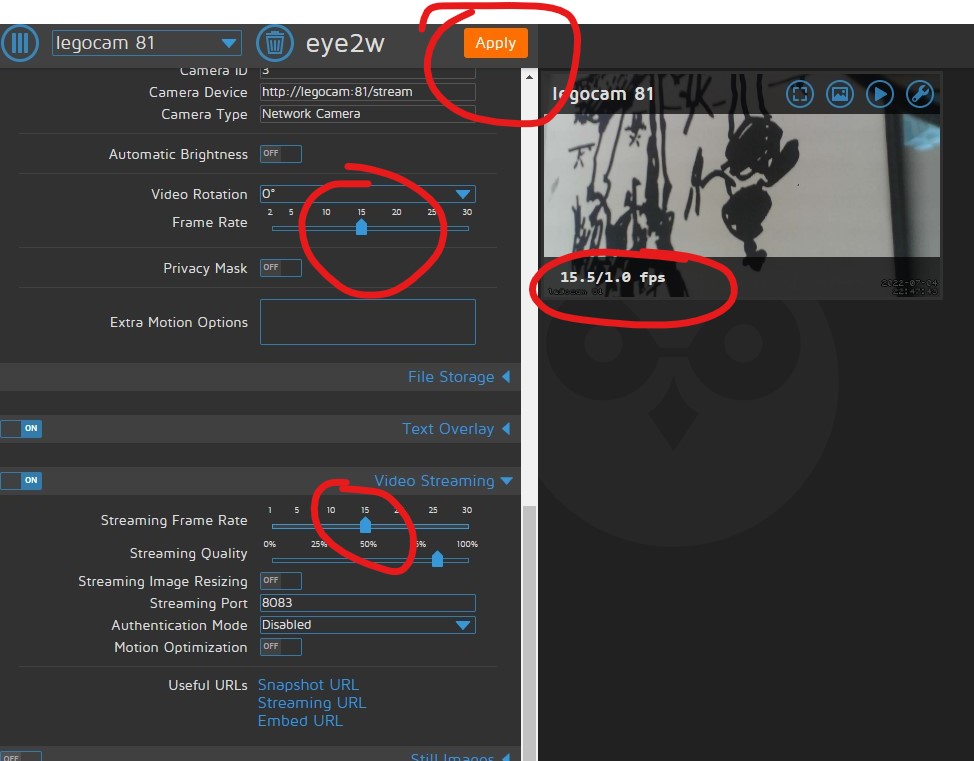
And after the Apply it is fully working.